Wednesday, November 20, 2024

DIY Wooden Benches for Modern and Cozy Home Interiors

DIY Wooden Benches for Modern and Cozy Home Interiors

DIY Wooden Benches for Modern and Cozy Home Interiors

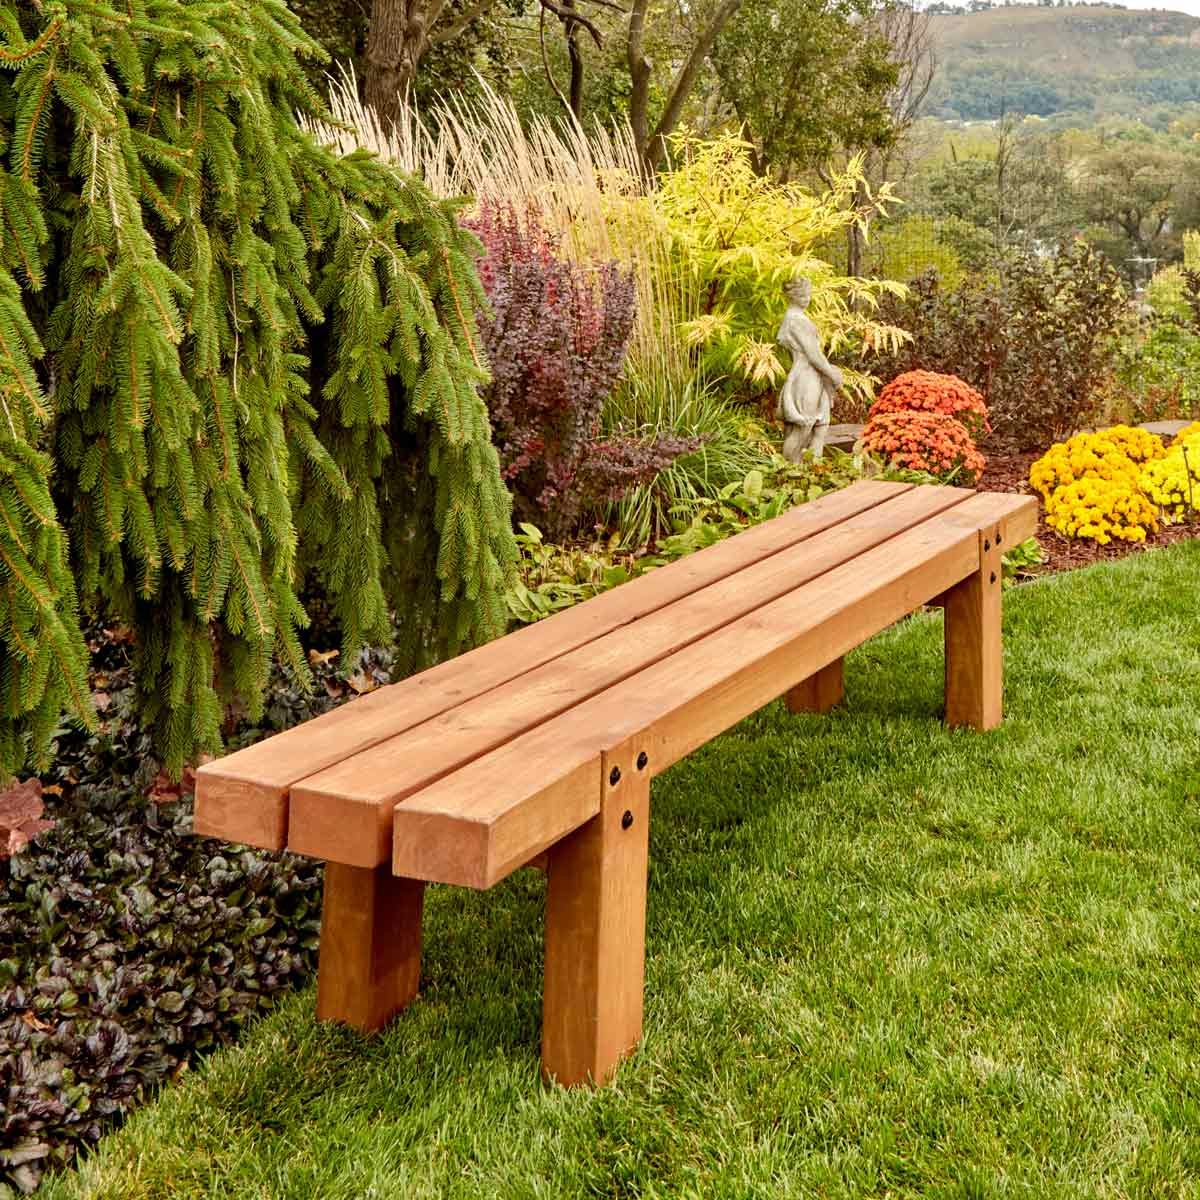
Hey there, fellow design enthusiasts! Let's talk about wooden benches. These versatile pieces of furniture are not only practical but also incredibly stylish. They can transform any space, adding warmth, functionality, and a touch of rustic charm. But here's the exciting part â€" building your own wooden bench is easier than you might think! This guide will walk you through the entire process, from choosing the right wood and design to assembling and finishing your masterpiece. So, grab your tools, gather your materials, and let's create something special together.

Why Choose Wooden Benches?

Wooden benches are a timeless classic for several reasons:

  • Versatility: They seamlessly blend with various design styles, from minimalist to farmhouse and everything in between.
  • Durability: With proper care, wooden benches can last for years, adding value and character to your home.
  • Functionality: They offer additional seating, storage space (with built-in compartments), and even serve as room dividers.
  • Personalization: The beauty of DIY is the freedom to customize your bench, choosing the dimensions, style, and finishing touches that suit your taste.

Design Inspiration for Your Wooden Bench

Before you start gathering materials, it's important to visualize your dream bench. Here are some ideas to spark your creativity:

Modern Minimalist Bench

This sleek design focuses on clean lines, simple shapes, and a minimal use of materials. Opt for a light wood like birch or maple and a clear, natural finish. You can incorporate metal accents for a modern touch.

Rustic Farmhouse Bench

Think reclaimed wood, distressed finishes, and a touch of farmhouse charm. Incorporate details like X-shaped supports, wide planks, and a natural, weathered look.

Mid-Century Modern Bench

This style blends functionality with elegance. Consider walnut or mahogany for a rich, warm tone, and incorporate geometric shapes and tapered legs.

Bohemian Bench

Embrace the eclectic and colorful with a bohemian bench. Use a mix of woods, textures, and vibrant colors. You can even add fabric cushions or tassels for an extra touch of personality.

Materials and Tools You'll Need

Now, let's gather the essentials:

  • Wood: Pine, cedar, oak, maple, walnut, or reclaimed wood. Consider the desired look and durability.
  • Lumber: 2x4s for the legs and supports, and 1x12s or 1x6s for the seat and backrest.
  • Hardware: Screws, wood glue, hinges (if building a bench with a lid), and corner brackets (optional).
  • Finishing Supplies: Wood stain, paint, sealant, and brushes.
  • Tools: Saw (circular or chop saw), drill, measuring tape, level, pencil, sander, and safety gear (goggles, gloves, and ear protection).

Step-by-Step Guide to Building Your Wooden Bench

Ready to get your hands dirty? Here's a general outline for building your bench:

  1. Plan and Design: Sketch out your bench design, determine the dimensions, and create a cutting list for your lumber.
  2. Cut the Lumber: Carefully cut the wood according to your measurements. Use a saw with a straight edge guide for precise cuts.
  3. Assemble the Legs and Supports: Join the legs to the support beams using wood glue and screws. Ensure the structure is square and sturdy.
  4. Attach the Seat and Backrest: Secure the seat and backrest planks to the supports using wood glue and screws. Make sure the seat is level and comfortable.
  5. Add Optional Features: If you're building a bench with storage, attach hinges to the seat and create a lid. You can also add decorative accents or corner brackets.
  6. Sand and Finish: Sand the entire bench to create a smooth surface. Apply stain, paint, or sealant according to your desired finish.

Tips for Success

Here are some handy tips to make the process easier and ensure a high-quality finished product:

  • Measure twice, cut once: Accuracy is crucial, so double-check your measurements before making any cuts.
  • Use a level: Ensure that your bench is level and stable for a professional look and comfortable seating.
  • Pre-drill holes: This will prevent wood from splitting when you're driving screws.
  • Sand thoroughly: A smooth finish will prevent splinters and allow the stain or paint to adhere evenly.
  • Apply multiple coats of finish: This will protect your bench from wear and tear and enhance its durability.

Beyond the Basics: Creative Ideas

Ready to take your wooden bench to the next level? Here are some exciting ideas to personalize your creation:

  • Incorporate Built-in Storage: Create a bench with a hinged lid to store blankets, books, or other items.
  • Add a Backrest: Enhance comfort and create a more inviting seating experience.
  • Choose Unique Wood Types: Reclaimed wood, driftwood, or even bamboo can add a distinct character to your bench.
  • Experiment with Finishes: Try distressed paint, metallic finishes, or a natural oil-based sealant for a unique look.
  • Decorate with Upholstery: Add cushions, fabric panels, or even leather accents for a touch of softness and style.

Frequently Asked Questions

You've got questions, we've got answers! Here are some common queries:

Q: What kind of wood is best for a DIY bench?

A: Pine is affordable and easy to work with, but it's softer. Oak, maple, and walnut are stronger and more durable but also more expensive. Consider your project's needs and your budget.

Q: How do I prevent the wood from warping?

A: Make sure the wood is properly dried and acclimated to your environment before assembling. Choose lumber that is kiln-dried, and store it in a dry, well-ventilated space.

Q: How do I choose the right finish for my bench?

A: Consider the look you want to achieve. Stains enhance the natural beauty of the wood, while paints allow for greater color and style options. Sealants protect the wood from moisture and scratches.

Q: Can I add storage to my bench?

A: Absolutely! You can build a lidded bench with a compartment for storage or create a simple shelf underneath for extra space.

There you have it! Armed with these tips, you're ready to embark on your DIY wooden bench adventure. Embrace the creative process, enjoy the challenge, and create a unique piece that reflects your personal style.
Tuesday, November 19, 2024

Simple DIY Picture Frames to Sell Year-Round

Simple DIY Picture Frames to Sell Year-Round

Simple DIY Picture Frames to Sell Year-Round

Looking for a fun and profitable side hustle? Look no further than crafting simple DIY picture frames to sell year-round! This craft is easy to learn, requires minimal supplies, and allows for tons of creative customization. Plus, picture frames are always in demand, making this a great way to tap into a consistent market.

Whether you're a seasoned crafter or just starting out, this article will guide you through the basics of making DIY picture frames and provide tips for selling your creations. Get ready to unleash your inner artist and turn your passion into a profitable venture!

Choosing Your Picture Frame Supplies

Before you dive into the crafting process, let's gather the essential supplies. Here's a breakdown of the materials you'll need, along with some tips for making smart choices:

Wood

Wood is the most common material for picture frames, and for good reason! It's durable, versatile, and offers a wide range of styles.

  • Consider your target market. If you're aiming for a rustic look, reclaimed wood or barn wood are fantastic choices. For a modern vibe, opt for sleek, polished wood like maple or walnut.
  • Think about your budget. You can find wood at craft stores, lumberyards, or even salvage yards. Look for sales and deals to stretch your budget.
  • Don't be afraid to experiment. Consider using plywood, MDF board, or even repurposed materials like old crates or pallets for a unique touch.

Glass

Glass protects your photos and gives them a polished look.

  • Standard glass is the most affordable option. It's clear and offers good protection.
  • Acrylic is a lighter and more shatterproof alternative to glass, making it a good choice for families with young children or pets.
  • Non-reflective glass minimizes glare, making it ideal for showcasing artwork or photos in bright spaces.

Hardware and Tools

To assemble your picture frames, you'll need a few essential tools and supplies. You can often find all of these at craft stores or online.

  • Miter saw or jigsaw: For making precise cuts in wood.
  • Sandpaper: To smooth out rough edges and create a professional finish.
  • Wood glue: For securely bonding the frame pieces together.
  • Clamps: To hold the frame together while the glue dries.
  • Screwdriver and screws: To secure the back panel of the frame.
  • Picture frame hardware: This includes hanging wire, D-rings, sawtooth hangers, and other hardware options.
  • Finish (optional): Stain, paint, or varnish to personalize your frames.

Picture Frame Design Ideas

Once you've gathered your supplies, it's time to get creative! Here are some popular DIY picture frame designs to inspire you:

Classic Frames

Classic frames are timeless and elegant. They feature simple, clean lines and a polished finish. Use a miter saw to create precise 45-degree angles for the corners, and consider adding a decorative molding for extra detail.

Rustic Frames

Embrace the beauty of imperfections with rustic frames. Use reclaimed wood, leave the bark intact, or add distressing effects to create a cozy, vintage feel. You can also use nails or screws to attach the frame pieces, adding to the rustic aesthetic.

Modern Frames

For a modern look, choose sleek wood and minimal ornamentation. Opt for clean lines, geometric shapes, and contemporary colors. Consider using metallic accents or adding a bold, graphic design to your frame.

Unique Frames

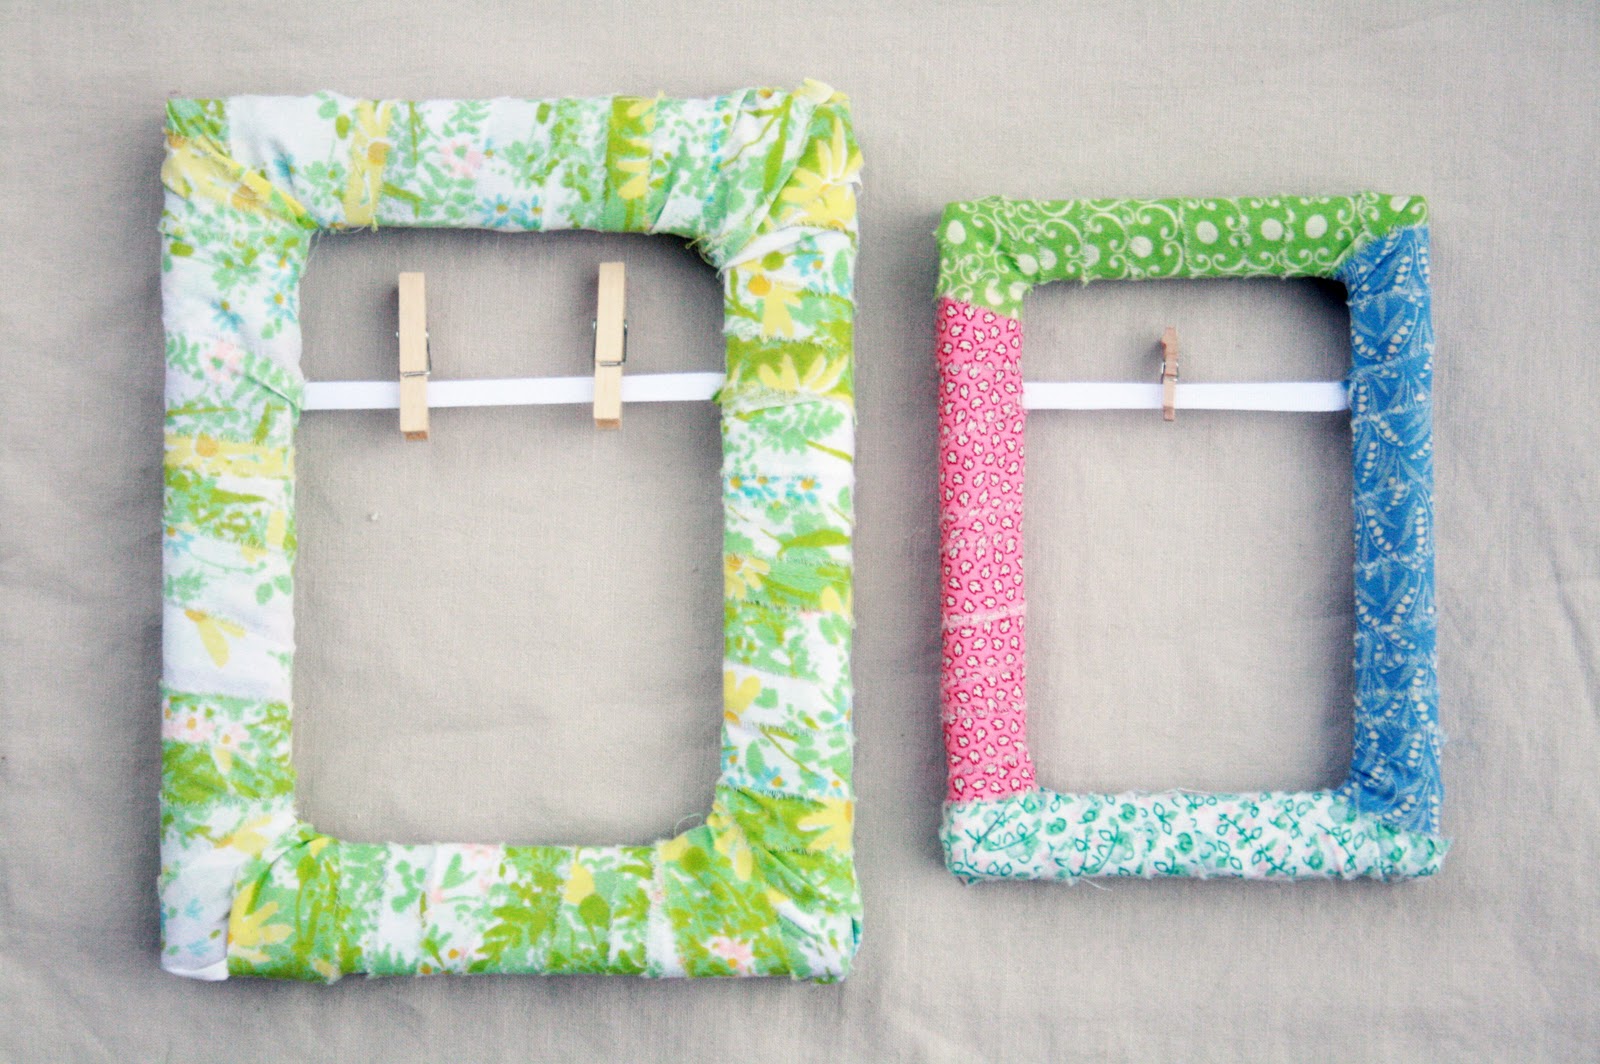
Don't be afraid to think outside the box! Explore unique materials like metal, plastic, or fabric. You can also experiment with different shapes, textures, and patterns to create eye-catching pieces.

Tips for Making and Selling Your DIY Picture Frames

Now that you have a solid understanding of the basics, here are some tips to help you create beautiful, sellable picture frames:

  • Focus on quality. Invest in good quality materials and tools to ensure your frames are well-made and durable.
  • Practice your craft. Start with simple designs and work your way up to more intricate projects. Don't be afraid to experiment and learn from your mistakes.
  • Customize your frames. Offer different sizes, colors, and styles to cater to a wider audience. You can also personalize frames with names, dates, or special messages.
  • Take high-quality photos. Showcase your frames in a professional and appealing way. Use natural lighting and a neutral background to highlight the details.
  • Consider your pricing. Research the market to determine competitive pricing for your frames. Factor in the cost of materials, your time, and your desired profit margin.
  • Promote your products. Create a website or online shop to sell your frames. Share your creations on social media and participate in local craft fairs.
  • Provide excellent customer service. Respond to inquiries promptly and handle any issues professionally. Word-of-mouth is a powerful tool for building a successful business.

Commonly Asked Questions

Here are some frequently asked questions about crafting and selling DIY picture frames:

What kind of wood is best for picture frames?

The best wood for picture frames depends on your desired look and budget. Some popular options include pine, oak, maple, walnut, and reclaimed wood. For a rustic look, choose reclaimed wood or barn wood. For a modern vibe, opt for sleek, polished wood like maple or walnut.

How do I cut wood for a picture frame?

A miter saw is the best tool for making precise cuts in wood for picture frames. If you don't have a miter saw, you can use a jigsaw or a handsaw, but it will take more time and effort to achieve the desired accuracy.

How do I finish my picture frames?

You can finish your picture frames with stain, paint, or varnish to achieve the desired look. Consider using a clear sealant to protect the finish and make it easier to clean.

How do I price my picture frames?

When pricing your picture frames, factor in the cost of materials, your time, and your desired profit margin. Research the market to determine competitive pricing for similar frames. You can also offer different pricing tiers based on size, complexity, and materials used.

Where can I sell my picture frames?

There are many places to sell your DIY picture frames, including online marketplaces like Etsy and Amazon Handmade, local craft fairs, and online stores. You can also sell directly to individuals through social media or word-of-mouth.

Crafting and selling DIY picture frames is a rewarding and profitable side hustle. With a little creativity and effort, you can turn your passion into a successful business! Remember to focus on quality, offer a variety of designs, and provide excellent customer service. Best of luck with your frame-making endeavors!

How to Make Custom Picture Frames for Extra Income

How to Make Custom Picture Frames for Extra Income

Crafting Custom Picture Frames for Extra Income: A Comprehensive Guide

In the realm of creative endeavors, crafting custom picture frames presents a compelling opportunity to generate extra income. This guide will provide a comprehensive overview of the process, from conceptualization to marketing, enabling you to establish a thriving side hustle or even transform your passion into a full-fledged business.

1. Understanding the Market and Identifying Your Niche

Before embarking on your picture frame crafting journey, it's essential to conduct thorough market research to gain insights into customer preferences and identify your niche.

1.1. Analyzing Market Trends

  • Popular Frame Styles: Research current trends in interior design and home decor to understand which frame styles are in high demand. This might include minimalist, rustic, vintage, or contemporary designs.
  • Material Preferences: Identify the materials most sought after by customers, such as wood, metal, acrylic, or even unique materials like reclaimed wood or bamboo.
  • Target Audience: Determine your ideal customer base. Are you catering to art enthusiasts, families, or businesses?
  • 1.2. Defining Your Niche

    Once you've analyzed market trends, pinpoint a specific niche within the picture frame market. This could involve:

  • Specializing in a particular frame style: For instance, focusing on handcrafted rustic frames or elegant minimalist designs.
  • Offering unique materials: Experiment with unconventional materials like repurposed wood, metal scraps, or natural elements.
  • Targeting a specific clientele: Catering to photographers, artists, or businesses with specialized framing needs.
  • 2. Acquiring Essential Tools and Materials

    Creating high-quality picture frames requires a set of tools and materials. Invest in tools that will enable you to produce professional-looking frames while ensuring your safety.

    2.1. Essential Tools

  • Measuring Tape: Accurate measurements are crucial for precision.
  • Saw: Choose a saw suitable for the materials you'll be working with, such as a miter saw for clean cuts or a handsaw for smaller projects.
  • Sandpaper: Essential for smoothing rough edges and creating a polished finish.
  • Clamps: Securely hold pieces together during assembly.
  • Screwdriver: For assembling the frame components.
  • Glue Gun: Useful for attaching decorative elements or reinforcing joints.
  • 2.2. Essential Materials

  • Wood: Pine, oak, maple, and walnut are popular choices for picture frames. Consider sustainability and sourcing from reputable vendors.
  • Metal: Aluminum, brass, and steel offer a modern look. Choose materials that complement your frame style.
  • Glass: Standard, non-reflective, or UV-protective glass are options based on the artwork's requirements.
  • Hardware: Choose sturdy hinges, corner brackets, and backing boards for stability.
  • Finishing Products: Wood stains, paints, varnishes, and waxes enhance the frame's appearance and provide protection.
  • 3. Mastering Frame Construction Techniques

    The beauty of custom picture frames lies in the craftsmanship. Here's a breakdown of common construction techniques:

    3.1. Cutting and Joining

  • Miter Joints: These angled cuts create a seamless corner where the frame pieces meet. Use a miter saw or a handsaw for precise cuts.
  • Rabbet Joints: These joints create a groove that allows the glass and artwork to sit securely within the frame.
  • Butt Joints: Simpler joints where the ends of frame pieces meet directly. These are often used for frames with a rustic or minimalist aesthetic.
  • 3.2. Assembling the Frame

    Once the frame pieces are cut and joined, they need to be assembled.

  • Gluing: Apply wood glue to the joints, ensuring a strong bond.
  • Clamping: Use clamps to hold the frame together while the glue dries.
  • Screwing: Drive screws through the frame pieces and into the backing board for added stability.
  • 3.3. Finishing Touches

  • Sanding: Smooth any rough edges or imperfections using sandpaper.
  • Finishing: Apply stains, paints, or varnishes to create the desired look.
  • Decorative Elements: Add embellishments like decorative molding, metal accents, or fabric accents.
  • 4. Marketing and Selling Your Custom Picture Frames

    With your frames crafted, it's time to bring them to the market.

    4.1. Establishing an Online Presence

  • Website: Create a professional website showcasing your frame designs, pricing, and contact information.
  • Social Media: Utilize platforms like Instagram, Pinterest, and Facebook to share your creations, engage with customers, and build your brand.
  • Online Marketplaces: Sell your frames through platforms like Etsy, Amazon Handmade, or Shopify.
  • 4.2. Offline Sales Channels

  • Craft Fairs and Markets: Participate in local events to showcase your work directly to potential customers.
  • Partnerships: Collaborate with art galleries, framing shops, or interior designers to reach a wider audience.
  • Local Businesses: Offer your services to local businesses for framing their artwork or signage.
  • 4.3. Pricing and Promotion

  • Cost Calculation: Factor in the cost of materials, labor, and overhead to set competitive pricing.
  • Value Proposition: Highlight the uniqueness of your frames, such as handcrafted details, high-quality materials, or personalized touches.
  • Promotions: Offer discounts, bundle deals, or free delivery to attract customers.
  • 5. Continuous Improvement and Innovation

    The picture frame market is dynamic, so staying ahead of the curve requires continuous improvement and innovation.

    5.1. Seeking Feedback

    Regularly seek feedback from customers to understand their preferences and areas for improvement.

    5.2. Experimenting with New Designs and Materials

    Embrace creativity and experiment with new frame styles, materials, and techniques to keep your offerings fresh and appealing.

    5.3. Staying Up-to-Date on Industry Trends

    Attend industry events, read trade publications, and follow design trends to remain informed about the latest developments in the picture frame market.

    Conclusion

    Crafting custom picture frames offers a rewarding path to generating extra income. By meticulously researching the market, acquiring essential tools, mastering construction techniques, and implementing effective marketing strategies, you can establish a successful side hustle or even turn your passion into a thriving business. Remember, dedication, creativity, and a commitment to customer satisfaction are key ingredients for success in this rewarding field.

    Monday, November 18, 2024

    Wooden Key Holders with a Natural or Rustic Finish That Will Sell Fast

    Wooden Key Holders with a Natural or Rustic Finish That Will Sell Fast

    Wooden Key Holders with a Natural or Rustic Finish That Will Sell Fast

    In the world of home décor, key holders are more than just functional necessities; they are often the first things people see when they walk in the door, making them a unique opportunity to set the tone for your home's aesthetic. Wooden key holders, especially those with a natural or rustic finish, are experiencing a surge in popularity, attracting buyers who appreciate the warmth and charm of handcrafted pieces.

    The appeal of these key holders lies in their versatility. They blend seamlessly with various design styles, from modern farmhouse to minimalist and everything in between. Their durability and timeless elegance ensure they remain stylish and functional for years to come.

    The Allure of Natural and Rustic Finishes

    Natural and rustic finishes on wooden key holders evoke a sense of authenticity and connection to nature. They create a welcoming and inviting atmosphere, instantly adding warmth and character to any entryway.

    Natural Finishes

    Natural finishes showcase the wood's inherent beauty, emphasizing its unique grain patterns and color variations. They often involve minimal processing, allowing the wood's natural texture and character to shine through. Popular natural finishes include:

    • Oil Finish: Enhances the wood's natural color and grain, adding a subtle sheen and a protective layer.
    • Wax Finish: Provides a soft, natural sheen, enhancing the wood's texture and protecting it from moisture.
    • Shellac Finish: Offers a durable and traditional finish, highlighting the wood's natural beauty while providing a protective barrier.

    Rustic Finishes

    Rustic finishes embrace the imperfections and textures of reclaimed or weathered wood, adding a touch of vintage charm and character. These finishes often involve techniques that highlight the wood's age and history, creating a unique and one-of-a-kind look. Some popular rustic finishes include:

    • Distressed Finish: Creates a weathered and aged look, often achieved by sanding or distressing the wood to reveal its underlying layers.
    • Reclaimed Wood Finish: Utilizes salvaged wood, showcasing its unique characteristics and history, adding a touch of sustainability and eco-friendliness.
    • Whitewash Finish: Adds a light, airy, and rustic feel, creating a distressed look while preserving the wood's natural grain.

    Factors Contributing to the Popularity of Wooden Key Holders

    Several factors contribute to the increasing popularity of wooden key holders with natural or rustic finishes:

    Sustainability and Eco-Consciousness

    Consumers are becoming increasingly aware of the environmental impact of their purchasing decisions. Wood is a renewable resource, and using reclaimed or sustainably sourced wood contributes to eco-friendly practices. Choosing wooden key holders over plastic or metal alternatives aligns with the growing trend toward sustainability.

    Unique and Personalized Style

    Wooden key holders offer a unique and personalized way to add character to your home. They can be customized with different designs, finishes, and hardware, making them a reflection of your individual style and preferences. The natural variation in wood grain and texture ensures that each piece is truly one-of-a-kind.

    Durability and Longevity

    Well-crafted wooden key holders are built to last. They are sturdy and resistant to scratches and dents, making them a practical and long-lasting investment. With proper care, they can withstand the test of time, serving as a treasured heirloom for generations to come.

    Versatility and Design Flexibility

    Wooden key holders seamlessly blend with various interior design styles. Their natural warmth and rustic charm create a welcoming ambiance, making them perfect for modern farmhouse, minimalist, bohemian, and traditional homes. They can be incorporated into a variety of entryways, hallways, or mudrooms, adding a touch of elegance and practicality.

    Types of Wooden Key Holders That Sell Fast

    Within the diverse world of wooden key holders, certain types consistently stand out and appeal to a wide range of buyers:

    Wall-Mounted Key Holders

    Wall-mounted key holders are a popular choice for their space-saving design and easy installation. They come in various shapes, sizes, and configurations, allowing you to find the perfect fit for your entryway.

    • Key Hooks: Simple yet effective, key hooks offer a convenient way to hang keys, coats, bags, and other accessories. They can be arranged in a variety of patterns or clustered together to create a focal point.
    • Key Shelves: Combine functionality with storage, offering a platform for keys and other small items. Key shelves can be designed with compartments, hooks, or cubbies to suit different needs.
    • Key Boxes: Provide a secure and enclosed space for keys, offering additional protection from dust and dirt. They can be designed with a hinged lid, sliding door, or magnetic closure.

    Free-Standing Key Holders

    Free-standing key holders offer flexibility in placement, allowing you to move them around as needed. They can serve as decorative accents in any entryway, adding a touch of warmth and charm to your home.

    • Wooden Key Stands: Typically feature a base and a vertical post with hooks or shelves for holding keys, mail, and other items. They are often crafted from solid wood and finished with natural or rustic treatments.
    • Key Baskets: Provide a rustic and casual way to store keys and other items. Key baskets can be made from woven wood or crafted from solid wood with a basket-like design.

    Tips for Creating Wooden Key Holders That Sell Fast

    To ensure your wooden key holders are in high demand, consider these tips:

    • High-Quality Materials: Use durable and sustainable wood species like oak, maple, walnut, or reclaimed wood. Choose wood with a beautiful grain pattern and natural variations.
    • Unique and Eye-Catching Designs: Offer a variety of shapes, sizes, and configurations to cater to different tastes. Consider incorporating unique details like decorative carvings, metal accents, or repurposed materials.
    • Durable Finishes: Apply a protective finish to seal the wood and prevent damage from moisture, scratches, and wear. Natural oil finishes, waxes, or shellacs are excellent choices.
    • Focus on Functionality: Ensure your key holders are practical and easy to use. Consider incorporating features like multiple hooks, compartments, or shelves to cater to various needs.
    • Marketing and Branding: Highlight the natural and rustic elements of your key holders in your marketing materials. Showcase their unique designs, durability, and eco-friendly aspects.
    • Competitive Pricing: Research your competitors and set prices that are competitive but also reflect the quality and craftsmanship of your products.
    • Customer Service: Provide excellent customer service and support, addressing any questions or concerns promptly. Offer a warranty or guarantee to build trust with your customers.

    By incorporating these tips, you can create wooden key holders that are not only beautiful and functional but also highly sought after by customers looking for unique, sustainable, and handcrafted home decor.

    Wednesday, November 13, 2024

    Profitable Shoe Rack Ideas for Beginners to Build and Sell

    Profitable Shoe Rack Ideas for Beginners to Build and Sell

    Profitable Shoe Rack Ideas for Beginners to Build and Sell

    Hey there, aspiring entrepreneurs! Looking for a cool side hustle that's both creative and practical? Building and selling shoe racks might just be your ticket to success. We're talking about more than just those boring, basic metal racks you see at the store. Think stylish, functional, and customized pieces that people will actually want to display in their homes.

    The great thing about this business is that you don't need a ton of fancy equipment or a huge workshop to get started. Plus, the materials are relatively inexpensive, and there's a huge potential market out there for unique and affordable shoe storage solutions.

    Ready to turn your woodworking skills into a profitable business? Let's dive into some winning shoe rack ideas you can start building and selling today!

    Simple and Classic Shoe Rack Designs

    Let's face it, sometimes simpler is better. You're not trying to reinvent the wheel here, just build solid, functional shoe racks that people will love.

    Tiered Shoe Rack

    This is a classic for a reason: It's easy to build and offers a ton of versatility. You can create a two-tier, three-tier, or even four-tier rack depending on the height and space you need. Use wood, metal, or a combination of both to give it your own unique style.

    Wall-Mounted Shoe Rack

    Space-saving and stylish, this is a perfect choice for smaller homes or apartments. Wall-mounted racks can be made using wood, metal, or even reclaimed materials like pallets. You can even get creative with the shapeâ€"make it rectangular, curved, or even a cool geometric design.

    Over-the-Door Shoe Rack

    This one is a real crowd-pleaser, offering a quick and easy way to add extra storage without taking up floor space. These racks can be made with a simple frame and shelves, or you can get fancy with fabric pockets or metal wire grids.

    Unique and Trendy Shoe Rack Ideas

    Now let's talk about making your shoe racks stand out from the crowd. We're going to inject some personality and creativity into these designs, making them highly sought-after by customers.

    Industrial-Style Shoe Rack

    Embrace the raw beauty of exposed metal and wood. Use reclaimed wood, metal pipes, and exposed fasteners to create a rugged yet stylish look. This style is hot right now, and people are willing to pay a premium for that industrial vibe.

    Mid-Century Modern Shoe Rack

    If you're into sleek lines and minimalist aesthetics, this is the style for you. Use clean-cut wood, metal accents, and perhaps even a touch of leather to create a classic and elegant look. This style never goes out of fashion, and it will always be in demand.

    Rustic Shoe Rack

    Embrace the natural beauty of wood! Use reclaimed barn wood, rough-hewn timbers, and natural finishes to create a warm and inviting look. This style is perfect for farmhouse, country, and cottage chic homes.

    Tips for Building and Selling Your Shoe Racks

    Alright, so you've got your ideas. Now, let's talk about turning those designs into a successful business.

    Choosing Your Materials

    Think about your target market and the style you're going for. Consider factors like durability, cost, and availability when choosing your materials. Here are some popular options:

    • Wood: Pine, oak, maple, and even plywood are great for creating a variety of styles.
    • Metal: Steel, aluminum, and wrought iron are strong and durable, and they can be painted or left raw for an industrial look.
    • Reclaimed materials: Old pallets, barn wood, and even repurposed metal can add a unique touch.

    Building Your Shoe Racks

    If you're a beginner, start with simple designs and gradually work your way up to more complex projects. Practice your skills, watch tutorials, and don't be afraid to experiment.

    • Use high-quality tools and materials for durable and professional-looking results.
    • Measure twice, cut onceâ€"accuracy is key to a well-built shoe rack.
    • Invest in a good sander to smooth out rough edges and create a professional finish.
    • Consider using a stain, paint, or sealant to protect your finished product and enhance its appearance.

    Marketing and Selling Your Shoe Racks

    Time to get those shoe racks in front of customers!

    • Start with an online presence. Create a website or an Etsy shop to showcase your work and take orders.
    • Get social. Use Instagram, Facebook, and Pinterest to share photos of your shoe racks and connect with potential customers.
    • Attend local craft fairs and markets. This is a great way to get direct feedback from customers and build relationships.
    • Partner with local businesses. See if you can sell your shoe racks at home decor stores, furniture shops, or even interior design studios.
    • Offer custom orders. Let customers personalize their shoe racks with different finishes, materials, and even special requests.

    Pricing Your Shoe Racks

    This is where you need to be strategic! You want to price your shoe racks competitively while still ensuring you make a profit.

    • Consider the cost of materials. Factor in the price of wood, metal, hardware, paint, and any other supplies you use.
    • Calculate your labor costs. Think about the time it takes to build each shoe rack, including design, cutting, assembly, sanding, and finishing.
    • Research your competition. See what other shoe rack makers are charging, and try to price yourself accordingly.
    • Factor in your profit margin. You want to make sure you're making a decent profit on each sale, so be realistic with your pricing.

    A Final Word of Advice

    Building and selling shoe racks can be a fun and rewarding way to turn your skills into a business. Just remember to stay passionate, be creative, and always listen to your customers.

    Good luck, and happy building!

    Tuesday, November 12, 2024

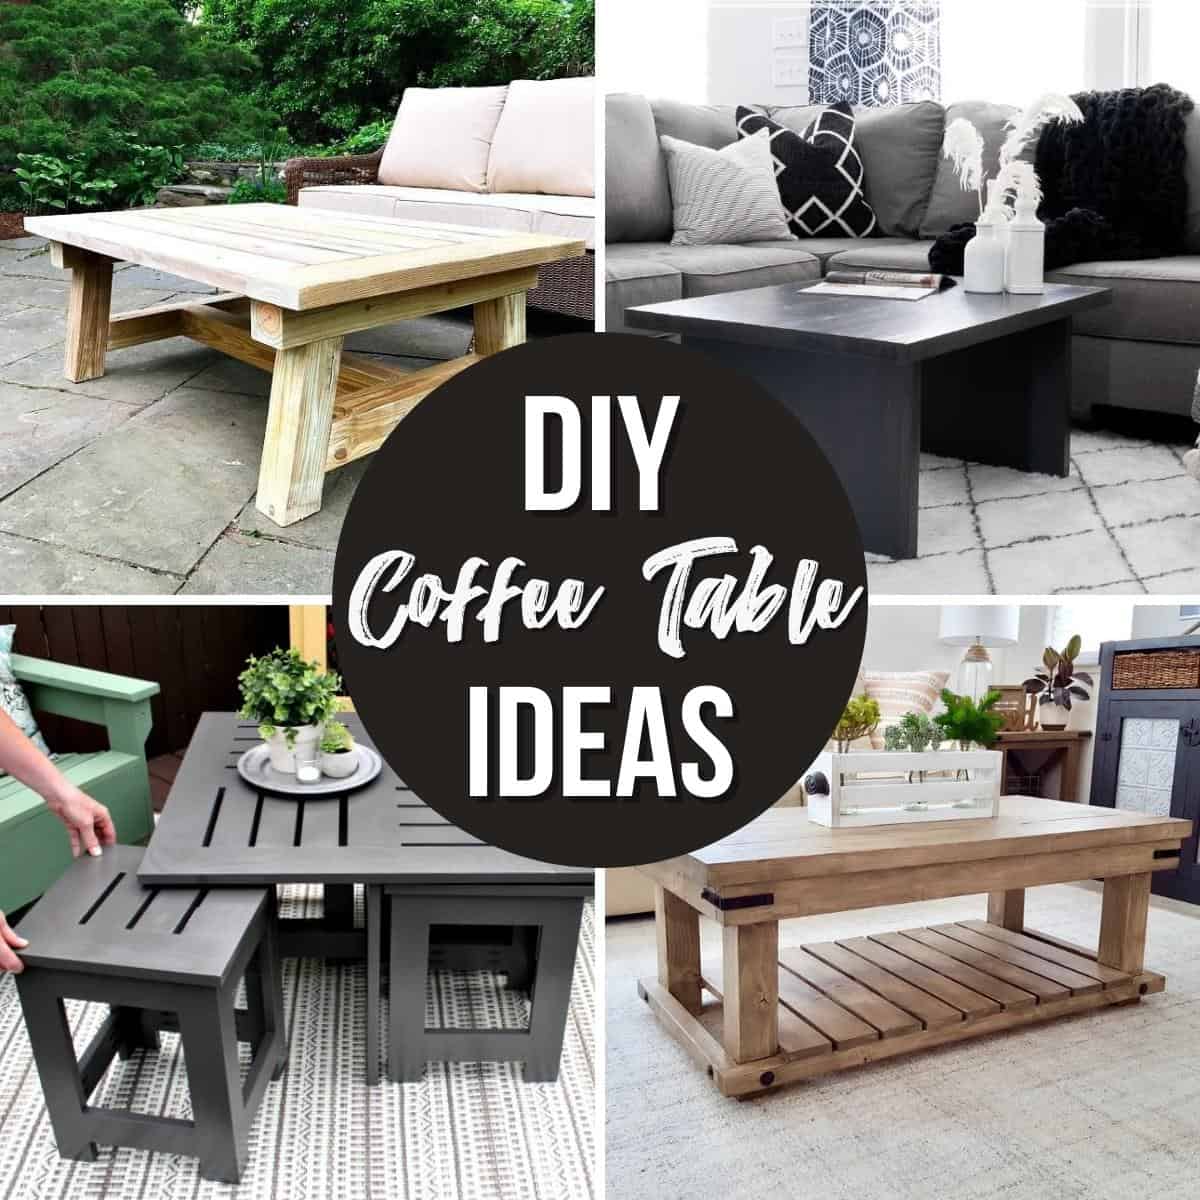
    DIY Coffee Table Ideas with Easy-to-Follow Plans

    DIY Coffee Table Ideas with Easy-to-Follow Plans

    DIY Coffee Table Ideas with Easy-to-Follow Plans

    A coffee table is a central piece of furniture in any living room, offering a surface for drinks, snacks, and decorative items. However, store-bought coffee tables can be expensive, leaving you with limited design options. A DIY coffee table is a fantastic alternative, allowing you to customize the style and size to perfectly complement your space. This article provides easy-to-follow plans for several coffee table projects, ranging from simple to more challenging, enabling you to create the perfect coffee table for your home.

    Simple Pallet Coffee Table

    This project is perfect for beginners and requires minimal tools and materials.

    Materials:

    • Pallet
    • Sandpaper
    • Wood stain or paint (optional)
    • Wood screws
    • Power drill
    • Level
    • Measuring tape

    Instructions:

    1. Prepare the pallet: Remove any loose nails or staples from the pallet. Sand down the surface to achieve a smooth finish.
    2. Optional: Apply a wood stain or paint to your desired color and allow it to dry completely.
    3. Assemble the table: If necessary, you can use screws to secure the pallet boards together for added stability.
    4. Add legs (optional): To create a raised coffee table, attach legs to the pallet using screws or brackets. You can use wooden legs, metal legs, or even repurposed furniture legs.

    Industrial Pipe Coffee Table

    For a modern and industrial look, consider this project.

    Materials:

    • Wooden tabletop (choose a size and thickness that suits your preference)
    • Industrial pipes (ensure they are compatible with your chosen tabletop size)
    • Flanges (to connect the pipes to the tabletop)
    • Pipe cutter or hacksaw
    • Thread sealant tape
    • Adjustable wrench
    • Level
    • Measuring tape

    Instructions:

    1. Prepare the tabletop: Sand and finish the tabletop as desired.
    2. Measure and cut pipes: Cut the pipes to the desired length for the legs.
    3. Attach flanges: Attach the flanges to the underside of the tabletop.
    4. Assemble the legs: Thread the pipes into the flanges. Use thread sealant tape on the threads to prevent leaks.
    5. Check for stability: Ensure the legs are level and secure before placing the table.

    Farmhouse-Style Coffee Table

    For a rustic and charming feel, consider this farmhouse-inspired coffee table.

    Materials:

    • Reclaimed wood planks (ensure the planks are straight and sturdy)
    • Wood glue
    • Wood screws
    • Power drill
    • Sandpaper
    • Wood stain or paint (optional)
    • Level
    • Measuring tape
    • Casters (optional)

    Instructions:

    1. Prepare the wood: Sand down the reclaimed wood planks to remove any rough edges and ensure a smooth surface.
    2. Construct the tabletop: Glue and screw the wood planks together to form a solid tabletop.
    3. Create the base: You can use reclaimed wood to build a simple base for the tabletop or purchase pre-made legs from a hardware store.
    4. Attach the base: Secure the tabletop to the base using screws.
    5. Finish: Apply a wood stain or paint to your desired color. You can also add a distressed look by lightly sanding areas after applying paint.
    6. Optional: Add casters to the base for easy mobility.

    Mid-Century Modern Coffee Table

    This sleek and stylish project draws inspiration from the mid-century modern design era.

    Materials:

    • Plywood (choose a thickness that suits your preference)
    • Wood glue
    • Wood screws
    • Power drill
    • Sandpaper
    • Wood stain or paint (optional)
    • Metal legs (search for mid-century style legs online or at a hardware store)
    • Level
    • Measuring tape

    Instructions:

    1. Prepare the plywood: Sand down the plywood to ensure a smooth surface.
    2. Cut the tabletop: Cut the plywood to your desired size and shape.
    3. Attach the legs: Use wood glue and screws to attach the metal legs to the underside of the tabletop. Make sure the legs are evenly spaced and secure.
    4. Finish: Apply a wood stain or paint to your desired color. Consider using a mid-century modern color palette, such as walnut, teak, or gray.

    Tips for Success

    Here are some tips for successful DIY coffee table projects:

    • Plan Ahead: Choose a project that suits your skill level and available time. Draw a plan and gather all necessary materials and tools before you begin.
    • Measure Twice, Cut Once: Accurate measurements are crucial for a well-constructed table. Ensure you have the right dimensions for all components before cutting or assembling.
    • Safety First: Always wear safety glasses and protective gear when using power tools.
    • Take Your Time: Don't rush the project. Take your time, and ensure each step is done properly.
    • Enjoy the Process: Building your own coffee table is a rewarding experience. Enjoy the process and be proud of your accomplishment.

    With these easy-to-follow plans and a little bit of effort, you can create a stunning and unique coffee table that perfectly complements your home decor. Don't be afraid to experiment with different materials, colors, and designs. Happy building!

    Free Coffee Table Plans PDF: DIY Build and Guide

    Free Coffee Table Plans PDF: DIY Build and Guide

    Free Coffee Table Plans PDF: DIY Build and Guide

    Hey there, fellow DIY enthusiast! Tired of staring at that boring, generic coffee table in your living room? Want a piece of furniture that screams "I built this myself!"? Well, you've come to the right place! Today, we're diving into the world of DIY coffee tables with a free set of plans and a super-easy guide to help you bring your coffee table dreams to life.

    We're going to keep it simple, focusing on a classic, rectangular coffee table that's perfect for any living room. We'll go through the process step-by-step, from choosing your materials to applying the finishing touches. So, grab your tools, put on your favorite DIY playlist, and let's get building!

    Why Build Your Own Coffee Table?

    You might be thinking, "Why bother building a coffee table when I can just buy one?". And you're right, there are plenty of great coffee tables available. But here's why building your own is totally worth the effort:

    • You get to customize everything! Choose the perfect size, shape, and style to fit your home. You're not limited by what's available in stores.
    • You'll save money. Building your own coffee table can be significantly cheaper than buying a comparable one.
    • It's a rewarding experience! There's a real sense of accomplishment that comes from building something yourself. And the bragging rights are pretty sweet too. 😉

    Materials You'll Need:

    Now, before we jump into the plans, let's talk about what you'll need to gather. This is a basic list, but you can adjust it based on your chosen design and the materials you like to work with.

    • Wood for the top and legs: You can use any type of wood you prefer. Pine, plywood, oak, maple, walnut - the options are endless! Just make sure the wood is sturdy and well-seasoned.
    • Wood glue: This will help to bond the pieces together.
    • Wood screws: These will help secure the legs to the top.
    • Sandpaper (various grits): For smoothing out the wood and preparing it for finishing.
    • Wood stain or paint (optional): For adding color and a protective finish.
    • Polyurethane or varnish (optional): For protecting the wood and making it more durable.
    • Measuring tape: To make sure everything is cut to the right size.
    • Saw (table saw, circular saw, or hand saw): For cutting the wood.
    • Drill: For pre-drilling holes for screws and for attaching the legs.
    • Clamps: For holding pieces together while the glue dries.
    • Safety glasses and dust mask: Protect your eyes and lungs from dust and debris.

    The Coffee Table Plans PDF:

    Alright, here comes the good stuff! Click the link below to download a PDF file containing the detailed coffee table plans.

    [Insert Link to PDF here]

    The plans will include:

    • Detailed drawings: These show you exactly how the pieces fit together.
    • Cut list: This tells you how much of each material you'll need and the exact dimensions of each piece.
    • Assembly instructions: Step-by-step instructions on how to put the coffee table together.

    Building Your Coffee Table:

    Now, let's get down to the fun part - building your coffee table! Follow these steps and you'll be sipping your morning coffee on your DIY masterpiece in no time.

    Step 1: Cut the Wood

    Using your saw and the cut list from the PDF, cut out all the pieces for your coffee table.

    Step 2: Sand the Wood

    Sand down the wood to smooth out any rough edges and make sure the surface is nice and even. Start with a coarser grit sandpaper and finish with a finer grit.

    Step 3: Assemble the Legs (Optional)

    If you're using separate pieces for the legs, now's the time to assemble them. Use wood glue and screws to connect the pieces, ensuring they're square and secure.

    Step 4: Attach the Legs to the Top

    Use wood glue and screws to attach the legs to the top of the coffee table. Pre-drill holes to prevent the wood from splitting. Make sure the legs are positioned evenly and that the coffee table is level.

    Step 5: Stain or Paint (Optional)

    If you're staining or painting your coffee table, do it now. Make sure the stain or paint is fully dry before moving on.

    Step 6: Apply Finish (Optional)

    To protect the wood and give it a beautiful shine, apply a polyurethane or varnish. Let it dry completely before using the table.

    Final Touches and Enjoy!

    Congratulations! You've successfully built your own coffee table. Now it's time for the fun part - adding those personal touches to make it truly yours. Maybe throw in some stylish coasters, a vase full of flowers, or a cozy throw blanket. Let your creativity run wild!

    As you sit back and admire your handiwork, remember, you didn't just build a coffee table. You built a piece of furniture with a story, a testament to your DIY skills and your ability to create something beautiful and functional with your own two hands.

    How to Design and Build Your Own Firewood Rack from Pallets

    How to Design and Build Your Own Firewood Rack from Pallets

    Building a Firewood Rack from Pallets: A DIY Guide to Warmth and Style

    Are you tired of seeing those unsightly stacks of firewood cluttering your backyard? Do you dream of a more organized and visually appealing way to store your fuel for cozy evenings by the fireplace? Well, grab your tools and let's dive into a fantastic DIY project: building your own firewood rack from pallets!

    Not only is this project super budget-friendly (repurposing those old pallets is a win-win!), but it also allows you to unleash your creativity. You can customize the size, shape, and style to perfectly complement your outdoor space. Plus, the satisfaction of crafting something useful and unique with your own two hands is truly rewarding!

    Before you start dismantling pallets and wielding a saw, it's essential to plan your project carefully. Here's a breakdown of key considerations:

    Think about how much firewood you typically need and how much space you have available. A standard pallet is around 48 inches long and 40 inches wide, but you can create different configurations by combining multiple pallets or cutting them down.

    Browse online for inspiration or sketch out your own design. Do you want a simple, rectangular rack or something more elaborate with multiple levels or a leaning design? Maybe you want to add decorative elements like a rustic roof or a storage shelf for kindling?

    Gather your materials and tools. You'll likely need:

    • Pallet wood (ensure it's free from rot and pests)
    • Saw (hand saw, circular saw, or jigsaw)
    • Hammer
    • Screwdriver
    • Screws (wood screws, preferably galvanized for outdoor use)
    • Measuring tape
    • Level
    • Safety glasses and work gloves
    • Optional: Wood stain or paint, sandpaper, protective sealant

    Let's get our hands dirty! Here's a step-by-step guide for building your firewood rack:

    1. **Clean the pallets:** Remove any debris, dirt, or staples. You might need to use a wire brush for stubborn dirt. 2. **Disassemble the pallets:** Carefully pry apart the pallet boards, keeping in mind that the slats may have nails holding them together. 3. **Sand the boards:** Smooth any rough edges or splinters with sandpaper. 4. **Cut the boards:** Measure and cut the boards to the desired length for your firewood rack design.

    1. **Choose a design:** Decide whether you want a free-standing, leaning, or wall-mounted rack. 2. **Create a base:** For a free-standing rack, lay two pallet boards parallel to each other, spaced slightly apart to create a base for the firewood. 3. **Construct the sides:** Secure the side boards vertically to the base using screws. 4. **Add top and bottom rails:** For a traditional rack, attach top and bottom rails across the side boards. This will create the main structure. 5. **Build tiers (if desired):** For a multi-tier rack, add additional rails for each level to accommodate the firewood.

    1. **Sand and smooth:** Once the structure is complete, sand all the surfaces to create a smooth finish. 2. **Stain or paint (optional):** You can add color and protection to your firewood rack by staining or painting it. Let the finish dry completely. 3. **Seal (optional):** If desired, apply a protective sealant to help preserve the wood and make it weather-resistant. 4. **Enjoy your new firewood rack:** Once everything is dry, you can start filling it with firewood and admire your handywork!

    Now that you have the basics down, let your creativity shine! Here are some exciting ideas to elevate your firewood rack:

    • Add a roof: Create a rustic shelter over your firewood rack with salvaged pallet wood, corrugated metal, or even a tarp.
    • Incorporate a storage shelf: Add a shelf below the rack to store kindling, fire starters, or other fireplace accessories.
    • Leaning design: Instead of a free-standing rack, create a leaning design that leans against a wall for a more space-saving option.
    • Add decorative elements: Embellish your rack with unique accents, like rustic metal hooks, old wagon wheels, or salvaged pieces of wood.
    • Use different wood types: If you have access to other types of wood, consider incorporating them into your design to create a more unique look.

    Always prioritize safety when working with wood and tools. Remember:

    • Use proper safety gear: Wear safety glasses, work gloves, and closed-toe shoes.
    • Work in a well-ventilated area: Sawdust can be irritating, so work in a space with good airflow.
    • Handle tools carefully: Use tools properly and be aware of potential hazards.
    • Inspect pallets thoroughly: Make sure they are free from rot, pests, and any loose nails or staples.

    Building your own firewood rack from pallets is a fulfilling and rewarding project. You'll not only create a functional and stylish storage solution for your firewood but also get a chance to express your creativity and learn a valuable skill. So grab your tools, embrace the joy of DIY, and get ready to warm your home and heart with your custom-built firewood rack!

    Building the Perfect Bedside Cabinet for Storage Needs

    Building the Perfect Bedside Cabinet for Storage Needs

    Building the Perfect Bedside Cabinet for Storage Needs

    Your bedside cabinet is more than just a place to put your alarm clock and a glass of water. It's your personal sanctuary, a place to store your most cherished belongings and essential nighttime needs. But with so many options available, how do you create a bedside cabinet that truly suits your storage needs and complements your personal style?

    Planning for Success

    The first step in crafting the perfect bedside cabinet is to carefully consider your specific needs and preferences. Ask yourself:

    • What items do you need to keep within easy reach?
    • What type of storage solutions are most practical for your belongings?
    • What aesthetic will best complement your bedroom decor?

    Once you've identified your storage requirements and style, you can start exploring different design options.

    Choosing the Right Design

    The right bedside cabinet design should not only provide ample storage but also seamlessly integrate with your bedroom's overall aesthetic. Here are some factors to consider:

    Style and Material

    From classic to contemporary, there's a wide range of bedside cabinet styles available. You can choose from traditional wooden designs, sleek metal accents, or even rustic reclaimed wood pieces. Consider the overall theme of your bedroom and select a style that complements it. The material you choose will influence the look and feel of your bedside cabinet. Choose materials that are durable, easy to clean, and aesthetically pleasing.

    Size and Dimension

    Measure your bedside space carefully before you make your purchase. Make sure the cabinet you choose fits comfortably and allows for easy access to your belongings. Consider the height of the bedside table, as it should be at a comfortable reach when you're in bed.

    Storage Solutions

    Think about the types of storage solutions you need. Do you need a drawer for books and magazines? A shelf for your phone and charger? An open compartment for your alarm clock? Choose a cabinet that provides the specific storage features you require.

    Maximizing Storage Space

    Even a small bedside cabinet can be surprisingly efficient when you utilize every inch of space effectively. Consider these tips:

    • Utilize drawer organizers: Dividers and trays can help you create neat compartments within drawers, keeping small items like jewelry or stationery organized.
    • Embrace vertical space: Use shelves and tiered trays to store items at different heights, maximizing vertical space within the cabinet.
    • Use the top surface wisely: Add a stylish lamp, a decorative vase, or a small tray to hold frequently used items.

    Personalizing Your Bedside Cabinet

    Once you've designed the perfect bedside cabinet for your storage needs, it's time to personalize it with your own unique touch. Add a personal touch by incorporating:

    • Family photos: Display cherished memories in a stylish frame on the cabinet's surface.
    • Plants: Bring a touch of nature indoors by placing a small plant or succulent on the cabinet.
    • Decorative accents: Choose decorative items that reflect your personal style, such as a ceramic vase, a candle holder, or a sculpture.

    By carefully planning, selecting the right design, and adding personal touches, you can create a bedside cabinet that's not only functional but also a beautiful addition to your bedroom sanctuary.

    DIY Squirrel Den Box with Free Plans

    DIY Squirrel Den Box with Free Plans

    DIY Squirrel Den Box with Free Plans

    For nature enthusiasts and animal lovers, providing shelter and habitat for wildlife is a rewarding endeavor. Squirrels, with their playful antics and acrobatic skills, are a delight to observe, and constructing a squirrel den box offers a safe haven for these furry creatures. This comprehensive guide will equip you with the knowledge and steps to build your own squirrel den box, complete with free plans for a successful project.

    Understanding Squirrel Den Boxes

    Squirrel den boxes, often referred to as squirrel nesting boxes, are artificial shelters designed to mimic natural tree cavities, providing a safe space for squirrels to rest, raise young, and escape from predators.

    Benefits of Squirrel Den Boxes

    • Provides a safe haven from predators.
    • Offers protection from harsh weather conditions.
    • Supports squirrel population growth and biodiversity.
    • Adds a charming and natural element to your outdoor space.

    Types of Squirrel Den Boxes

    Squirrel den boxes come in various designs, but they generally share common features:

    • Single-Chamber Boxes: These boxes have a single chamber with an entrance hole, suitable for a single squirrel or a small family.
    • Multi-Chamber Boxes: These boxes offer multiple chambers, providing space for larger families or multiple squirrels.
    • Predator-Proof Boxes: These boxes incorporate features like metal shields or baffle systems to prevent predators from accessing the nest.

    Free Plans for Squirrel Den Box

    Below are free plans for a single-chamber squirrel den box, designed for easy construction and optimal functionality.

    Materials:

    • One 1x6 board (10 feet long)
    • One 1x8 board (8 feet long)
    • One 1x4 board (6 feet long)
    • Four 2x4 boards (8 feet long)
    • 1 1/2-inch screws
    • Wood glue
    • Weatherproof paint or stain (optional)

    Tools:

    • Saw
    • Drill
    • Measuring tape
    • Screwdriver
    • Level
    • Hammer

    Steps:

    1. Cut the Boards: Refer to the plan diagram below to cut the boards to the following lengths:
      • Front Panel: 1x6 board (16 inches long)
      • Back Panel: 1x6 board (16 inches long)
      • Side Panels: 1x6 board (12 inches long) x 2 pieces
      • Top Panel: 1x8 board (16 inches long)
      • Bottom Panel: 1x8 board (16 inches long)
      • Entrance Plate: 1x4 board (4 inches long)
      • Support Braces: 2x4 board (12 inches long) x 2 pieces
    2. Construct the Box Frame:
      • Attach the side panels to the front and back panels using screws and wood glue. Ensure the panels are flush and form a rectangular frame.
      • Attach the top panel to the frame, ensuring it overlaps the side panels by about 1/2 inch for added strength.
      • Secure the bottom panel to the frame, aligning it flush with the side panels.
    3. Create the Entrance Hole:
      • Measure and mark a 3-inch diameter circle on the front panel, approximately 6 inches from the top.
      • Using a jigsaw or drill bit, carefully cut out the circular entrance hole.
      • Attach the entrance plate to the front panel, centered over the entrance hole, to provide a smooth lip for the squirrels to climb on.
    4. Install Support Braces:
      • Attach the support braces inside the box, running vertically from the top panel to the bottom panel, near the back wall.
      • These braces provide additional support and prevent the roof from sagging.
    5. Add Finishing Touches (Optional):
      • Apply a coat of weatherproof paint or stain to the exterior of the box, to protect it from the elements and enhance its appearance.
      • You can also add decorative elements like a small wooden roof shingle or a birdhouse-style overhang.
    6. Mount the Den Box:
      • Select a suitable location for the den box, preferably in a shady area with nearby trees and shrubs for foraging.
      • Mount the box at a height of 10-15 feet from the ground, using heavy-duty brackets or straps.
      • Ensure the entrance hole faces away from prevailing winds and direct sunlight.
      • Leave a gap of at least 6 inches between the den box and the mounting surface for proper ventilation.

    Plan Diagram:

    Insert a diagram of the squirrel den box here. This diagram should include all dimensions and specifications of the box.

    Tips for Attracting Squirrels

    Once you've built your squirrel den box, there are several tips you can follow to encourage squirrels to make it their home:

    • Provide a Food Source: Place a bird feeder nearby, filled with seeds, nuts, or suet. This will attract squirrels to the area and increase the likelihood of them discovering your den box.
    • Offer Water: Provide a shallow dish or birdbath filled with fresh water, especially during dry seasons. Squirrels require water for hydration and to cool down.
    • Maintain Cleanliness: Periodically check the den box for signs of damage, mold, or insect infestation. Clean the box as needed to provide a hygienic environment for squirrels.
    • Avoid Disturbance: Once squirrels have moved in, avoid approaching or disturbing the den box unnecessarily. Allow them to settle in and raise their young peacefully.

    Ethical Considerations

    While building a squirrel den box can be a rewarding experience, it's important to consider the following ethical implications:

    • Overpopulation: Ensure that the number of den boxes you install is appropriate for the local squirrel population. Too many boxes may lead to overcrowding and competition for resources.
    • Predator Impact: Be mindful of the potential for predators to be attracted to the den boxes. Consider installing predator guards or using other strategies to minimize risks.
    • Disease Transmission: Monitor the health of squirrels in your area and be aware of potential diseases that could be spread through den boxes. If you notice any signs of illness, consult with a wildlife rehabilitation center.

    Conclusion

    Building a DIY squirrel den box is a rewarding project that can provide a safe and comfortable shelter for these playful creatures. By following these free plans and tips, you can create a welcoming haven for squirrels and enhance the biodiversity of your backyard. Remember to consider ethical factors and follow responsible practices to ensure the well-being of these fascinating animals.

    How to Design and Build Your Own Cold Frame

    How to Design and Build Your Own Cold Frame

    Design and Build Your Own Cold Frame

    A cold frame is a simple, yet invaluable tool for gardeners of all levels, allowing you to extend your growing season and protect delicate plants from harsh weather conditions. Whether you're starting seeds, hardening off seedlings, or overwintering plants, a cold frame provides a controlled microclimate that promotes optimal growth. Building your own cold frame is a rewarding endeavor that allows you to customize it to your specific needs and gardening space. This comprehensive guide will walk you through the design, construction, and maintenance of your very own cold frame.

    Choosing the Right Location

    The placement of your cold frame is crucial for its effectiveness. Consider the following factors:

    Sunlight Exposure

    Cold frames thrive in full sun, receiving at least 6-8 hours of direct sunlight per day. This ensures adequate warmth for your plants and promotes healthy growth. Avoid shady spots, as they will hinder the effectiveness of the cold frame.

    Drainage

    Proper drainage is essential to prevent waterlogging and root rot. Choose a location with well-draining soil, or consider building a raised bed for improved drainage. Avoid low-lying areas that may be prone to standing water.

    Wind Protection

    Wind can chill plants and create drafts within the cold frame. Locate your structure in a sheltered spot, ideally near a wall or hedge that provides protection from strong winds.

    Designing Your Cold Frame

    The design of your cold frame will depend on your individual needs and preferences. However, a few essential elements should be considered:

    Size and Shape

    The size of your cold frame will determine the number of plants you can accommodate. A standard cold frame typically measures 4 feet wide by 6 feet long, but you can adjust the dimensions to fit your space. Rectangular or square shapes are common, but you can also consider a curved or arched design for aesthetic appeal.

    Materials

    There are numerous materials suitable for building a cold frame, each with its own advantages and disadvantages:

    • Wood: A traditional and readily available material, wood is durable, affordable, and aesthetically pleasing. It offers good insulation and can be easily customized. However, it requires regular maintenance to prevent rotting and insect infestation.
    • Metal: Aluminum and steel are durable and long-lasting options, but they can be more expensive than wood. Metal can conduct heat, making it essential to consider insulation measures.
    • Plastic: Inexpensive and lightweight, plastic is a popular choice for cold frame construction. It is easy to assemble and offers good light transmission. However, plastic can be less durable and may deteriorate over time.
    • Recycled Materials: You can get creative with recycled materials such as pallets, windows, and doors to build your cold frame. This not only reduces waste but also adds a unique touch to your garden.

    Covering

    The covering of your cold frame plays a crucial role in regulating temperature and light. Consider the following options:

    • Glass: A traditional covering, glass offers excellent light transmission and insulation. However, it can be heavy and prone to breakage.
    • Polycarbonate: Durable, lightweight, and less prone to breakage than glass, polycarbonate is a popular choice for cold frame coverings. It offers good light transmission and thermal insulation.
    • Acrylic: Similar to polycarbonate, acrylic offers excellent light transmission and insulation. It is lighter than glass but may scratch more easily.
    • Plastic Film: A budget-friendly option, plastic film is readily available and offers good light transmission. However, it is less durable and may tear easily.

    Ventilation

    Proper ventilation is essential to prevent overheating and condensation buildup within the cold frame. Incorporate ventilation systems such as:

    • Adjustable Vents: Vents placed at the top and sides of the cold frame allow for controlled airflow. They can be adjusted to regulate temperature and humidity.
    • Openable Doors: Large doors on the front or back of the cold frame provide easy access for planting, tending, and ventilation.

    Construction

    Once you have chosen your design and materials, it's time to construct your cold frame. The specific steps will vary depending on the chosen materials and design, but here's a general guide:

    Prepare the Base

    Start by clearing the chosen location and preparing a level base. If building a raised bed, construct a frame of wood or concrete blocks. For a ground-level cold frame, level the soil and create a slight slope for drainage.

    Assemble the Frame

    Cut and assemble the frame according to your design. Use screws, nails, or other fasteners to secure the pieces together. Ensure the frame is sturdy and properly aligned.

    Attach the Covering

    Attach the chosen covering to the frame using appropriate methods. For glass or polycarbonate panels, use glazing beads or silicone sealant. For plastic film, stretch it tightly over the frame and secure it with staples, clips, or rope.

    Install Ventilation Systems

    Install vents, doors, or other ventilation systems as planned. Ensure they are securely fastened and function properly.

    Insulate (Optional)

    If you are using materials that are not inherently insulated, consider adding an insulation layer to the walls or floor of the cold frame. This will help to regulate temperature and improve frost protection.

    Maintenance and Operation

    Once your cold frame is built, it requires regular maintenance to ensure its longevity and optimal performance:

    Clean the Covering

    Regularly clean the covering to remove dirt, debris, and condensation buildup. This will ensure maximum light transmission and prevent damage to the covering.

    Monitor Temperature

    Monitor the temperature inside the cold frame, especially during extreme weather conditions. Use a thermometer to check the temperature and adjust ventilation as needed to maintain a suitable range for your plants.

    Water Regularly

    Plants in a cold frame may dry out more quickly than those in open ground. Water them regularly, especially during dry periods. Check the moisture level of the soil and water accordingly.

    Control Pests and Diseases

    Monitor your plants for pests and diseases. Take prompt action to control any issues and prevent them from spreading.

    Conclusion

    Building your own cold frame is a rewarding and cost-effective way to enhance your gardening experience. By carefully planning, constructing, and maintaining your cold frame, you can create a thriving microclimate that extends your growing season, protects delicate plants, and allows you to enjoy the joys of gardening throughout the year.

    How to Build a Birdhouse with a Stylish Shaped Roof

    How to Build a Birdhouse with a Stylish Shaped Roof

    Building a Birdhouse with a Stylish Shaped Roof

    Hey there, bird lovers! Want to add a touch of charm to your backyard and attract some feathered friends? Building a birdhouse is a fun and rewarding project, and there's no better way to personalize it than with a stylish shaped roof.

    We're going to walk through the steps of building a birdhouse with a unique roof, adding a dash of personality to your backyard sanctuary. Whether you’re a seasoned DIYer or a beginner, you'll find this guide easy to follow.

    Choosing Your Birdhouse Design

    Before you grab your tools, let's brainstorm some design ideas for your birdhouse roof! The possibilities are endless, but here are a few trendy and functional shapes to inspire you:

    Classic Gable Roof

    The gable roof is a tried-and-true design for a reason: it's simple, strong, and effective at shedding rain. Think of the classic red barn - that's a gable roof! To add a touch of personality, you can play with the angle of the slope or even add decorative trim.

    Charming Hip Roof

    For a slightly more sophisticated look, go with a hip roof. It's a four-sided pyramid shape that offers maximum weather protection. Hip roofs are often seen on houses, so they give your birdhouse a touch of architectural charm.

    Modern Shed Roof

    If you're looking for a contemporary style, consider a shed roof. This design is characterized by its single, sloping plane that creates a minimalist and sleek look. A shed roof also offers excellent drainage.

    Whimsical Curved Roof

    Feeling adventurous? A curved roof adds a playful touch to your birdhouse. Think of a little thatched cottage, or a whimsical mushroom house. It's a bit more challenging to build, but the results are sure to bring a smile to your face (and hopefully the birds too!).

    Gathering Your Supplies

    Once you've chosen your roof design, it's time to gather your supplies. Here's what you'll need for a basic birdhouse:

    • Wood (1x6 boards are a good starting point)
    • Wood glue
    • Screws (wood screws are best)
    • Saw (circular saw, jigsaw, or handsaw)
    • Drill
    • Measuring tape
    • Level
    • Pencil
    • Sandpaper
    • Paint or stain (optional)
    • Birdhouse entry hole saw (optional)
    • Birdhouse roof shingles (optional)

    Pro Tip: You can also reuse materials for your birdhouse! Old wooden crates, pallets, and even sturdy cardboard can be transformed into a birdhouse with a little creativity!

    Building the Birdhouse Base

    Now, let's get building! We're going to start with the foundation of your birdhouse.

    1. Cut the base: Using your saw, cut two pieces of wood to the desired length and width for your birdhouse base. These pieces will form the bottom of the birdhouse and the sides of the entry hole.
    2. Attach the base pieces: Lay the two pieces of wood side-by-side. Apply wood glue to the edges that will join. Secure the pieces together with screws.
    3. Cut the sides: Now, measure and cut four pieces of wood for the sides of your birdhouse. These pieces should be the same height as the base and the same length as the width of the base.
    4. Attach the sides: Apply wood glue to the top edges of the base and secure the sides to the base with screws. Make sure the sides are flush with the base and form a rectangle.

    You've got the foundation of your birdhouse ready!

    Constructing the Stylish Roof

    Let's tackle the fun part - the roof! This is where you'll get to showcase your creativity and add a unique touch to your birdhouse. Remember, choose a roof design that suits your style and matches your birdhouse's overall look.

    Gable Roof

    1. Cut the roof pieces: For a gable roof, you'll need two pieces of wood that are angled to form a triangle. Measure the width of the birdhouse base, and add a couple of inches on each side for the overhang. You'll also need to determine the height of the roof. A common height for birdhouses is about 4-6 inches.
    2. Create the gable: Lay the two angled roof pieces on the top of the birdhouse, with the bottom edges flush with the sides of the birdhouse. Secure them to the birdhouse with screws.
    3. Add a decorative trim: For a more refined look, you can cut a small piece of wood and attach it to the bottom edge of the gable roof to create a cornice.

    Hip Roof

    1. Cut the roof pieces: A hip roof has four triangular sides. Measure the width and length of the birdhouse base. Cut four angled pieces of wood, ensuring that each side of the triangle matches the measurements of the birdhouse.
    2. Assemble the hip roof: Attach the four angled roof pieces to the top of the birdhouse, ensuring they form a pyramid shape.
    3. Add a ridge: To enhance the visual appeal of your hip roof, you can cut a narrow piece of wood and attach it along the center ridge of the roof, where the four angled sides meet.

    Shed Roof

    1. Cut the roof piece: For a shed roof, you'll need a single piece of wood that slopes down from one side of the birdhouse to the other. The length of this piece should match the width of the birdhouse, and the length should be determined by the desired slope of the roof.
    2. Attach the roof piece: Place the single piece of wood on top of the birdhouse, making sure the front edge is flush with the birdhouse’s front. Secure it with screws.

    Curved Roof

    For a curved roof, you'll need some additional supplies like plywood, flexible wood strips, and possibly a jig saw. You'll be shaping the curved roof to your liking.

    1. Cut the plywood: Cut a piece of plywood to the desired size for the roof.
    2. Shape the plywood: Use a jig saw to create a curved edge around the plywood piece. You can create a gentle curve or a more dramatic arc, depending on your preference.
    3. Attach flexible strips: Attach flexible strips of wood (like cedar shingles or cedar shakes) to the plywood to create a thatched or layered look. You can also experiment with decorative materials like vines or twigs.
    4. Secure the curved roof: Attach the curved plywood roof to the top of the birdhouse using screws or nails.

    Finishing Touches

    Your birdhouse is almost ready for its feathered residents! Now for the finishing touches:

    1. Add the entry hole: Use a birdhouse entry hole saw or a drill to create an opening for the birds to enter. The size of the entry hole will depend on the type of bird you're hoping to attract. Research the preferred entry hole size for your target bird species.
    2. Sand and smooth: Sand down the entire birdhouse to remove any rough edges. This will also ensure a smooth surface for painting or staining.
    3. Paint or stain: If you're adding color, apply paint or stain to the birdhouse. You can use a brush or a spray can for a more even application.
    4. Add roof shingles: To protect the roof from the elements, you can add shingles made of wood, asphalt, or metal. You can also use a waterproof sealant to ensure durability.

    And there you have it - a stylish, personalized birdhouse, ready to welcome its feathered friends! Don't forget to clean the birdhouse periodically to keep it safe and sanitary for its occupants.

    Tips for Attracting Birds

    Now that you've built your beautiful birdhouse, let's make sure the birds are happy to call it home!

    • Location is key: Position your birdhouse in a sheltered spot that's protected from the elements. Avoid placing it in direct sunlight, as this can overheat the inside.
    • Height matters: Mount the birdhouse at a height that is safe from predators and gives the birds a good view of their surroundings.
    • Provide a water source: Birds need access to fresh water, so consider adding a birdbath or a shallow dish of water near the birdhouse.
    • Offer food: Birds will be more attracted to your birdhouse if there's a food source nearby. Consider putting out a feeder with seeds or suet.
    • Patience is a virtue: It may take some time for birds to discover your new birdhouse. Just be patient and enjoy watching them explore their new home.

    Happy birdwatching!

    Diy guide: wooden clock-making for beginners

    Diy guide: wooden clock-making for beginners

    DIY Wooden Clock-Making for Beginners: A Comprehensive Guide

    Crafting a wooden clock is a rewarding project that combines woodworking skills with a touch of artistry. It's a great way to add a personalized touch to your home décor while learning a new craft. This comprehensive guide will walk you through the process of building your own wooden clock from start to finish, even if you're a complete beginner.

    Materials You'll Need

    Before embarking on your clock-making adventure, gather the necessary materials. These include:

    • Wood: Choose a sturdy wood for the clock face and hands. Popular options include plywood, MDF, pine, or oak.
    • Clock Movement: This is the heart of your clock. You can find various types, including quartz movements (battery-powered) and mechanical movements (wind-up).
    • Clock Hands: Select hands that complement the size and style of your clock face.
    • Sandpaper: You'll need sandpaper in various grits for smoothing the wood.
    • Wood Glue: Use wood glue for attaching components together.
    • Stain or Paint: Choose your desired finish for the clock face and hands.
    • Clear Coat: Apply a clear coat for protection and durability.
    • Clock Numbers or Markers: You can use pre-made clock numbers or create your own using a stencil or a paint pen.
    • Measuring Tape: Essential for precise measurements.
    • Pencil: For marking and transferring measurements.
    • Saw: Choose a saw suitable for your wood type.
    • Drill: For creating holes for the clock movement and hands.
    • Screwdriver: For attaching the clock movement to the back of the clock face.
    • Clamps: To secure pieces while gluing.

    Step-by-Step Guide to Building Your Wooden Clock

    1. Designing the Clock Face

    Start by sketching out the design for your clock face. Consider the size, shape, and overall style. You can create a simple circular clock, a more elaborate square or rectangular design, or even explore more unique shapes.

    2. Cutting the Wood

    Once you have your design, carefully cut the wood according to your measurements. Use a saw that's appropriate for the type of wood you've chosen. Pay attention to safety and wear protective gear such as safety glasses and gloves.

    3. Sanding and Smoothing

    Sand the edges of the wood to ensure they are smooth and free of rough spots. Begin with coarser grit sandpaper and gradually move to finer grits for a polished finish. Take care not to sand too aggressively, as it can create uneven surfaces.

    4. Marking the Center and Installing the Clock Movement

    Use a pencil to carefully mark the center of your clock face. This will be the location for installing the clock movement. Drill a pilot hole at the marked center, slightly smaller than the diameter of the clock movement's shaft. Carefully insert the clock movement into the hole and secure it with the provided screws or nuts.

    5. Attaching the Clock Hands

    Align the hour and minute hands with their corresponding slots on the clock movement. Attach the hands using the included nuts or washers. Ensure they are securely fastened before moving on to the next step.

    6. Applying Stain or Paint

    Once the clock movement and hands are in place, you can apply your desired finish. If using stain, apply a thin, even coat and allow it to dry completely before applying additional coats. If using paint, choose a high-quality acrylic paint and apply multiple thin coats for a smooth, consistent finish.

    7. Adding Clock Numbers

    To create the clock face, you can use pre-made clock numbers or create your own using a stencil or paint pen. If using pre-made numbers, carefully attach them to the clock face using wood glue or adhesive. If using a stencil or paint pen, apply the numbers evenly and precisely. Allow the paint to dry completely before proceeding.

    8. Applying a Clear Coat

    After the clock face is complete, apply a clear coat to protect the wood and enhance its finish. Choose a water-based or oil-based polyurethane for a durable, long-lasting protection. Apply multiple thin coats, allowing each coat to dry completely before applying the next.

    9. Installing the Clock Mechanism

    Secure the clock mechanism to the back of the clock face using the provided screws or nuts. If using a quartz movement, insert the battery as per the instructions. If using a mechanical movement, wind it up using the provided key. Finally, hang the clock on the wall using the provided hardware or create a stand for it.

    Tips for Success

    • Use Quality Materials: Invest in high-quality wood and clock movement for a durable and reliable clock.
    • Practice Patience: Clock-making requires patience and attention to detail. Take your time and don't rush the process.
    • Plan Your Design: Sketch out your design before you start cutting wood to ensure accuracy.
    • Measure Twice, Cut Once: Accurate measurements are crucial for a well-proportioned clock. Double-check your measurements before making any cuts.
    • Sand Smoothly: Sanding is essential for a smooth and polished finish. Pay attention to details and remove any rough edges.
    • Clean Up After Each Step: Keep your workspace tidy throughout the process. It will make working easier and safer.

    Conclusion

    Building a wooden clock is an enjoyable and rewarding project. By following the steps in this guide, even beginners can create a beautiful and functional timepiece. Remember to practice patience, pay attention to detail, and enjoy the process of bringing your own design to life.

    Squirrel Box DIY Tips with Free Downloadable Plans

    Squirrel Box DIY Tips with Free Downloadable Plans

    DIY Squirrel-Proof Bird Feeder: A Comprehensive Guide

    Attracting birds to your garden can be a delightful experience, but pesky squirrels often pose a challenge. They're notorious for their agility and determination, making it difficult to keep them away from your bird feeders. A squirrel-proof bird feeder, however, can effectively deter these furry invaders and create a peaceful sanctuary for your feathered friends. This comprehensive guide provides step-by-step instructions and downloadable plans to construct your own DIY squirrel-proof bird feeder, allowing you to enjoy a bird-filled haven in your backyard.

    Choosing the Right Design

    Several squirrel-proof feeder designs are available, each with its strengths and weaknesses. Consider these options:

    Cage Feeders

    Cage feeders are a popular choice because they enclose the food, making it inaccessible to squirrels. They typically feature a wire mesh cage surrounding the feeding area, with small openings allowing birds to access the food while keeping squirrels out.

    Weight-Activated Feeders

    These feeders employ a clever mechanism that only dispenses food when a bird lands on the perch. When a squirrel tries to climb onto the feeder, its weight triggers a mechanism that closes the food access point, preventing it from reaching the seeds.

    Baffle Feeders

    Baffle feeders utilize a smooth, cone-shaped baffle that sits above the feeding area. Squirrels are unable to climb the slippery surface of the baffle, making it difficult for them to reach the feeder. This design is particularly effective when combined with a cage feeder.

    Pole-Mounted Feeders

    Pole-mounted feeders are commonly used to elevate the feeding area beyond the reach of squirrels. By attaching the feeder to a tall pole, you create a significant distance between the feeder and the ground, making it challenging for squirrels to access.

    Materials and Tools

    To build a DIY squirrel-proof bird feeder, you'll need the following materials and tools:

    • Wood (for the base, cage, and baffle, if applicable)
    • Metal mesh or wire (for the cage, if using a cage feeder)
    • Hardware (screws, nuts, bolts, washers)
    • Feed tray or container
    • Perch(es) for the birds to land on
    • Pole or stand (for pole-mounted feeders)
    • Saw (for cutting the wood)
    • Drill (for drilling holes for screws and bolts)
    • Screwdriver
    • Measuring tape
    • Level
    • Safety glasses
    • Work gloves

    Building a Cage Bird Feeder

    To create a cage bird feeder, follow these steps:

    1. Cut the Wood: Using your saw, cut the wood to create the base, sides, and top of the cage. Refer to the downloadable plans for specific dimensions.
    2. Assemble the Cage: Screw the sides and top to the base, creating a rectangular cage. Ensure the sides are tall enough to prevent squirrels from jumping over the top.
    3. Install the Metal Mesh: Cut and attach the metal mesh to the inside of the cage, leaving small openings for birds to access the food. Secure the mesh with screws or staples.
    4. Attach the Feed Tray: Place the feed tray inside the cage, ensuring it's accessible to birds but not large enough for squirrels to reach in.
    5. Install Perches: Attach the perches to the sides of the cage, providing landing spots for the birds.
    6. Add a Baffle (Optional): If desired, you can create a baffle to further deter squirrels. Construct a cone-shaped baffle from wood or metal and attach it to the top of the cage.
    7. Finish the Feeder: Paint or stain the feeder to your liking and let it dry completely before use.

    Building a Weight-Activated Feeder

    Building a weight-activated feeder involves more complex mechanisms. Here's a general guide:

    1. Construct the Base: Create a sturdy base using wood, making sure it can support the weight of the feeder and the food. The base will have a pivot point for the food dispenser.
    2. Build the Food Dispenser: This will be a tray or container attached to a lever or hinge. The weight of a squirrel will trigger the lever to close the dispenser, preventing it from getting food.
    3. Design the Trigger Mechanism: You can use various methods for the trigger, such as a simple weight-sensitive lever or a spring-loaded mechanism. Experiment with different designs to find what works best.
    4. Attach the Perch: Place the perch near the dispenser so that the weight of a bird will activate the trigger.
    5. Test and Adjust: Thoroughly test the feeder with different weights and adjustments until the trigger consistently activates for birds but not squirrels.

    Protecting Your Feeder

    Once you've built your squirrel-proof bird feeder, it's essential to protect it from the elements and other wildlife. Consider these tips:

    • Choose a Suitable Location: Position the feeder in a sheltered location away from strong winds, direct sunlight, and heavy rain.
    • Use a Roof or Shelter: A roof or shelter over the feeder will protect it from rain and snow, keeping the food dry and preventing mold growth.
    • Maintain the Feeder: Clean the feeder regularly to prevent buildup of food debris and the spread of diseases. Replace old food with fresh, high-quality seed.
    • Use a Seed Mix: Avoid using a seed mix that squirrels particularly love, such as peanuts or sunflower hearts. Choose a seed mix that attracts a variety of bird species.

    Downloadable Plans

    To help you with your DIY squirrel-proof bird feeder project, downloadable plans are available online. These plans provide detailed diagrams, dimensions, and instructions for different feeder designs. Search for "squirrel-proof bird feeder plans" online, and you'll find various options from woodworking websites and online stores.

    Conclusion

    Creating your own DIY squirrel-proof bird feeder is a rewarding experience that allows you to enjoy the beauty of birds in your garden without the unwanted intrusions of squirrels. By choosing the right design, using quality materials, and following the instructions carefully, you can construct a feeder that will provide a reliable food source for your feathered friends. Remember to enjoy the process of building your feeder and the joy of watching birds flock to your backyard sanctuary.

    Easy-to-Follow PDF Plans for a DIY Squirrel Box

    Easy-to-Follow PDF Plans for a DIY Squirrel Box

    Build Your Own Squirrel Box: A Step-by-Step Guide

    Hey there, fellow nature enthusiast! Are you tired of those pesky squirrels raiding your bird feeders? Or maybe you just want to provide a safe and cozy home for these adorable little creatures. Well, you're in luck! In this easy-to-follow guide, we'll walk you through building your own squirrel box, a project that's perfect for both beginners and seasoned DIYers.

    Building a squirrel box is a rewarding experience. Not only will you create a unique and beautiful addition to your backyard, but you'll also be helping out these furry friends by providing them with a safe and comfortable space to rest, nest, and raise their young.

    What You'll Need:

    Before we dive into the building process, let's gather all the materials you'll need. Don't worry, it's a pretty straightforward list:

    • 1x6 lumber (pine or cedar): About 8 feet long. This will be the main material for the box itself.
    • 1x4 lumber (pine or cedar): A couple of feet long. This will be used for the roof supports.
    • 1/4-inch plywood: A piece about 12x12 inches. This will be for the roof.
    • Wood screws: 1-1/4 inch and 2-inch length. These will be used for assembling the box and attaching the roof.
    • Wood glue: This will provide extra strength to your construction.
    • Weatherproof paint or stain (optional): To protect your squirrel box from the elements.
    • Heavy-duty wire or metal mesh: This will be used to create a vent for the box. You'll need a piece about 12 inches long.
    • Measuring tape and pencil: For accurate cutting.
    • Saw (circular, jigsaw, or hand saw): For cutting the wood to size.
    • Drill: To pre-drill holes for screws and to create the vent holes.
    • Safety goggles and gloves: Always wear safety gear when working with power tools.

    Building the Squirrel Box: Step-by-Step

    Now that you have all your materials ready, let's start building your squirrel box. Follow these simple steps, and you'll be ready to welcome your new furry tenants in no time:

    Step 1: Cut the Wood

    1. Using your saw, cut two pieces of 1x6 lumber to 12 inches in length. These will form the front and back walls of your squirrel box.
    2. Cut two more pieces of 1x6 lumber to 10 inches in length. These will be the side walls.
    3. Cut two pieces of 1x4 lumber to 12 inches in length. These will be the roof supports.
    4. Cut a piece of 1/4-inch plywood to 12x12 inches. This will be the roof.

    Step 2: Assemble the Box

    1. Lay one of the 12-inch 1x6 boards (front wall) flat on a workbench.
    2. Place one of the 10-inch 1x6 boards (side wall) perpendicular to the front wall, ensuring the edges line up.
    3. Apply wood glue to the joint and secure it with three 1-1/4-inch screws.
    4. Repeat steps 2 and 3 with the other side wall. Now you have the front, back, and one side wall assembled.
    5. Add the remaining 12-inch 1x6 board (back wall) to complete the box. Secure it with glue and screws like before.

    Step 3: Create the Roof Supports

    1. Place the two 1x4 lumber pieces (roof supports) parallel to each other, about 1-1/2 inches apart. The supports should be centered on the top of the box, spanning the entire width.
    2. Secure the supports to the box using 2-inch wood screws. Ensure they are firmly attached and that the space between them is uniform.

    Step 4: Attach the Roof

    1. Place the plywood roof on top of the roof supports. Make sure it overhangs the sides of the box slightly to create an eave.
    2. Secure the roof to the supports using several 2-inch wood screws, ensuring they are evenly distributed.

    Step 5: Add the Vent

    1. Use a drill to create two holes near the top of the back wall of the box. These holes will serve as ventilation for the squirrel box.
    2. You can also use a piece of heavy-duty wire or metal mesh to create a larger vent, creating an opening about 2 inches in diameter near the top back of the box.

    Step 6: Finishing Touches

    1. Apply weatherproof paint or stain to the box (optional). This will help protect the wood from the elements and enhance the appearance.
    2. Let the paint or stain dry completely before placing the squirrel box in your desired location.

    Choosing the Perfect Location

    Now that your squirrel box is ready, let's find the perfect spot for it in your backyard. Here are some factors to consider:

    • Height: Mount the squirrel box at least 6 feet above the ground, out of reach of predators like cats and dogs.
    • Protection: Choose a location that offers some protection from the elements, such as the shade of a tree or the shelter of a porch.
    • Access: Make sure the squirrel box is easy for squirrels to access. Choose a spot with nearby branches or a tree trunk that they can use to climb onto the box.
    • Privacy: Keep the box away from high-traffic areas or places where people frequently gather. Squirrels prefer a quiet and secluded spot to raise their young.

    Tips for a Happy Squirrel Family

    • Make it comfy: Line the inside of the squirrel box with soft bedding material like shredded paper, straw, or leaves. This will provide comfort and warmth for the squirrels.
    • Provide a food source: While squirrels are capable of finding their own food, you can offer them a supplemental food source near the box. Consider offering nuts, seeds, or fruits.
    • Clean regularly: Inspect and clean the squirrel box at least once a year, especially after the nesting season. Remove any debris or old bedding.

    Enjoy Watching the Squirrels!

    Congratulations! You've now successfully built a squirrel box that's sure to attract these playful creatures. Remember, patience is key. It may take a while for squirrels to discover your new box, but once they do, you'll be able to enjoy watching them interact with their new home. Happy building!